Dollar Store Challenge: Sunburst Mirror

Last week, we spent time visiting my parents in the Seattle area. Other than the entire household contracting a nasty respiratory virus (courtesy of my daughter), we had a great time spending time with family.

My brother and his fiancee live in the area and I was really excited to see them and catch up. While we were there we decided to do a couples’ challenge using Dollar Store items. The challenge is to create something using $5 worth of Dollar Store items to re-purpose into something else that can be sold on Craigslist for the most money. We are allowed to use paint, glue/adhesive, nails, staples and other bonding products, but that is about it.

Our deadline isn’t until May 15th, so the competition isn’t over yet, but in the process of brainstorming projects, I came up with this idea, which I may or may not use in the actual competition.

A Sunburst Mirror:

DIY Dollar Store Sunburst Mirror

DIY Dollar Store Sunburst Mirror. $5.

This project can be done for as little as $3. However, I spent the full $5 on mine. I will show you both versions.

I started out with these three basic items:

DIY Dollar Store Sunburst Mirror

Candle mirror, candle plate and mini plastic spoons.

sunburstmirrorplasticspoons

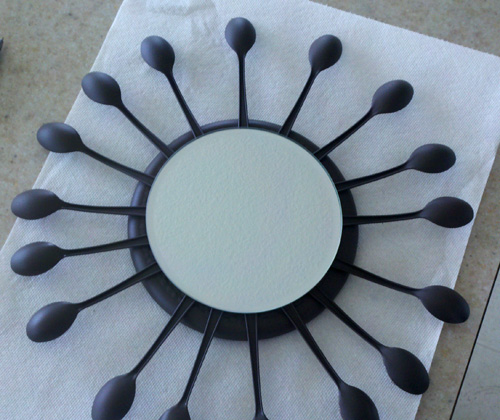
I started by hot gluing the spoons in a circle. It helps to do the 12, 3, 6, and 9 o’clock positions first and then evenly space in between these 4 points. Hot glue them like CRAZY so they will stay in place.

You can then spray paint the entire thing, front and back:
DIY Sunburst Mirror

After painting both sides and letting it dry, you can hot glue the mirror if you choose the $3 version of this mirror. If you want the $5 version DO NOT glue the mirror yet.

I decided after the fact that I wanted to embellish it a little:

DIY Dollar Store Sunburst Mirror

You can glue dollar store toothpicks in between the spoons to add a little more detail.

Obviously, I had to go back and repaint once I added these. If you know ahead of time you want to add them you can wait to paint the entire thing until after the toothpicks are added.

After everything dried, I hot glued the mirror on (tons of glue again!), and then added these jewels to each spoon end:

Dollar Store gems

Dollar Store gems from the craft/school supply aisle.

And that’s how I got this:

DIY Dollar Store Sunburst Mirror

DIY Dollar Store Sunburst Mirror. $5.

Use glass bonding glue to apply hanging hardware in the back. Follow all the directions to assure it dries and bonds properly.

So that is about it! I will let you know if I end up using this, or if I choose something else. And of course I will announce the winner when all is said and done (provided we win;)).

Thrift store sheets for fabric

I promised to eventually post a little about some sewing projects that I have completed. I received my sewing machine in late January. Since then I have done some self teaching but I have also had my mother and a couple of dear friends of mine guide me through pattern reading and the basics of sewing. I think it’s safe to say that I’m obsessed.

My husband often has to work late, but can bring his work home. So while he’s on his laptop, I’m next to him at a card table with my sewing machine hooked up working on various projects.

I recently started to try to sew some clothes for myself. That has always been a dream of mine. I’ve heard before that it is often more expensive to make your clothes than to buy them because fabric can be so pricey. Well, my friends, NOT if the fabric you’re using comes from the thrift store in bed sheet form. Not convinced?

Here is my latest project.

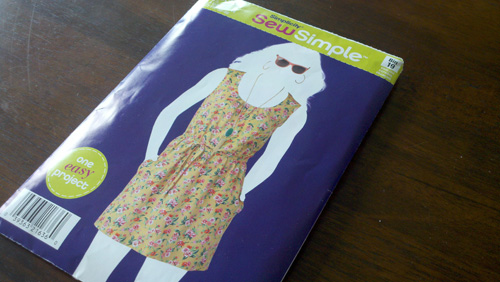
Wal-Mart Pattern

97 cent pattern from Wal-Mart.

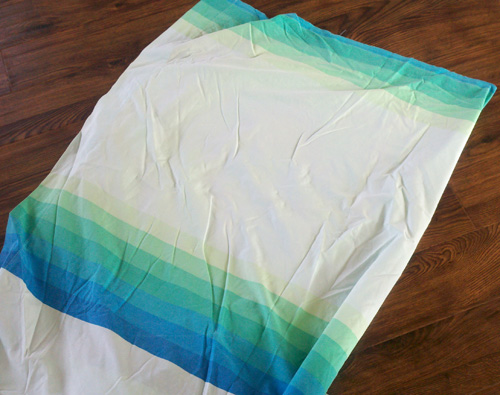
Thrift Store Sheet

Wrinkly $1 bed sheet from the thrift store. Equivalent to at least 3 yards of fabric.

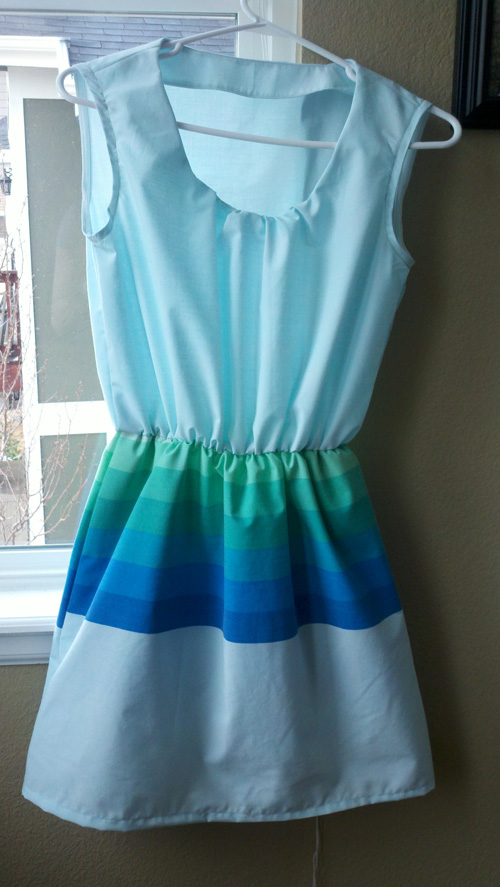
Finished dress

Finished dress.

Just call me Fraulein Maria.

I also found a cute white and gray pinstripe sheet that I will make into some other article of clothing.

More to come.

Anthropolgie-like repainted thrift store candelabra

Wow, that was a mouthful, wasn’t it?

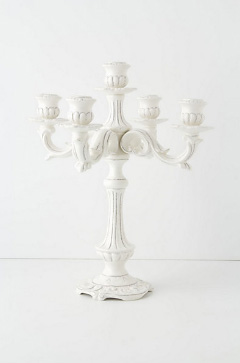
I swooned over this candelabra when I saw it on Anthropologie’s website:

Anthropologie Candelabra

Anthropologie Antiquity Candelabra.

The swooning was quickly followed by a mild heart attack when I read the price. $345. I know that their prices run high, but I just didn’t see this one coming.

Over the last few months I’ve made it my mission to find a candelabra at a thrift store because any decent candelabra seems to run between $50-$100 (from my extensive research on amazon.com… ha!).

In all honesty, I thought it would be easier to score one of these. But in reality, it took awhile to come across one. And you better believe that the moment I did, I snagged it.

Again, in my haste I forgot to take a picture of the before. It was a dark wood and wrought iron candelabra. It wasn’t awful, but it didn’t fit in with my decor style. And you know me, I paint everything. It’s kind of becoming an issue.

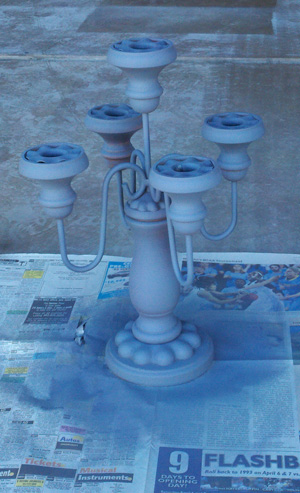
Here is a picture of it primed before I painted it white:

Anthropologie-like DIY Candelabra

Don’t be fooled by the bluish tint in this photo. It’s a true grey matte primer.

I chose grey because the distressed areas on the Anthro Candelabra are grey, and I didn’t want both wood and wrought iron showing through.

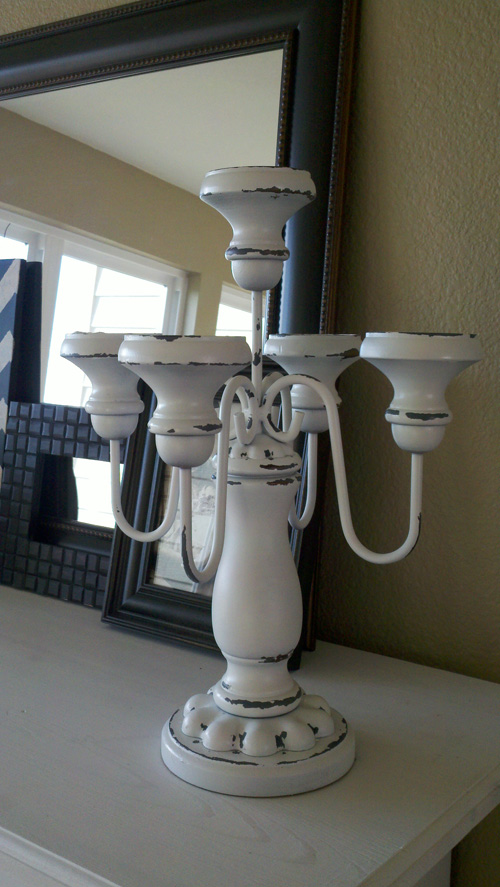
Anthropologie-like DIY Candelabra

Here’s my knock off after using Vaseline and white satin spray paint.

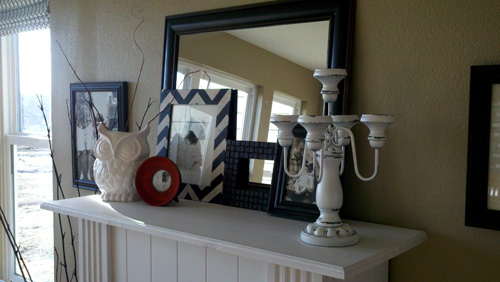
I realize this isn’t super similar to the Anthropologie Candelabra. I still like the Anthro one better and my chipped paint doesn’t have the same look either, but I still really like the way it looks on my mantel. I think for $12, I am more than satisfied.

Anthropologie-like DIY Candelabra

Now I just need some candles!

DIY Picture Frame Mirrors

I have always had a thing for mirrors. No, no, not in that way. I actually would prefer to keep my reflection OUT of them most of the time (unless I have something stuck in my teeth). But I love the way they look and the light they reflect. And also how they can make a space look bigger than it really is.

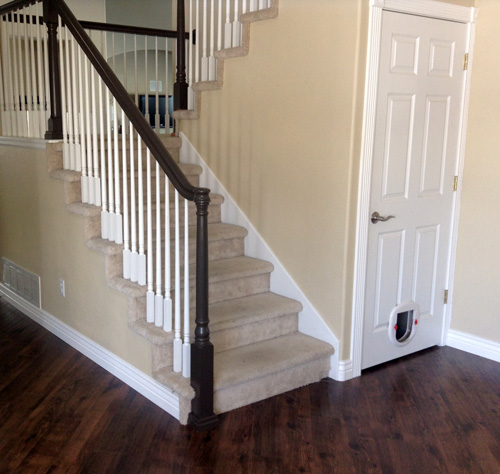
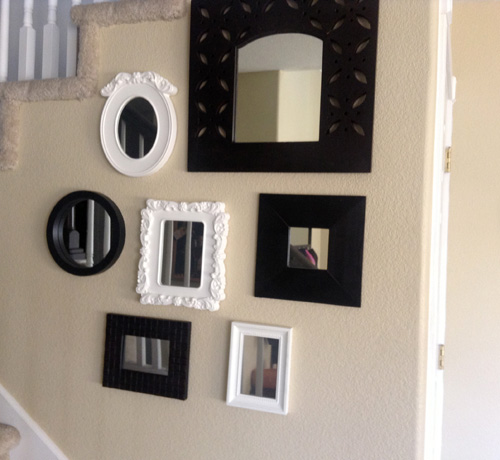
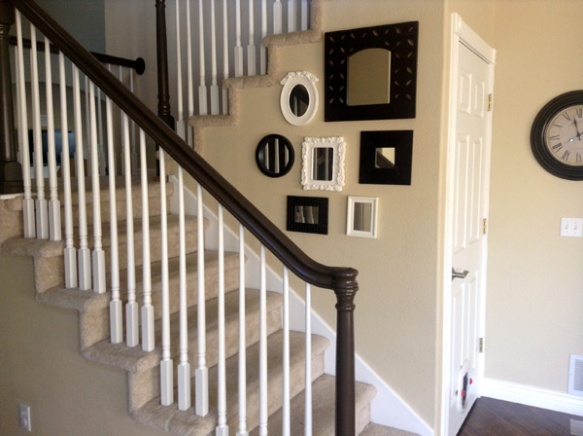
I wanted to create a wall of mirrors; all different shapes and sizes. When we painted our banister rail I thought it would be good timing to add something to the wall of the first set of stairs. It’s one of the first things you see when you walk into the house.

DIY Picture Frame Mirrors

Blank Wall with a few nail holes.

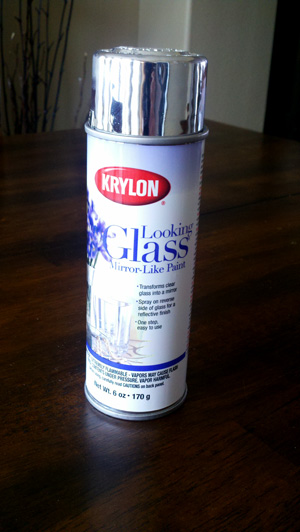
Instead of searching for a ton of different mirrors, I thought it might be easier to use left over looking glass paint from when I did all my mercury glass projects and turn picture frames into mirrors that way. It’s a lot easier to find small picture frames in a variety of shapes.

DIY Picture Frame Mirrors

You can get this at Wal-Mart for 8.97. It goes a long way!

I had a few mirrors already but I also bought some frames at IKEA that I thought would make darling mirrors. I’m sure you’ve seen them before:

DIY Picture Frame Mirrors

Add 5 thin coats to any glass surface, letting each coat dry for a full minute before adding the next. And ta-da! You have your very own antique looking mirror.

Now, here is the fine print. The paint has to be applied to glass surfaces only. The two decorative white frames from IKEA come with plastic instead of glass pieces. However, their $2 frames have almost the exact same size of glass that you can swap out and use instead, which is what I did.

This is the $2 frame I'm speaking of.

This is the $2 IKEA frame I’m speaking of.

The thing I love about the looking glass paint is that it makes a mirror-like surface but it looks antique-ish.

DIY Picture Frame Mirrors

Mirrors! Mirrors! On the wall!

So that’s about it. It’s a fun project that takes about an hour. You can spray all the glass pieces together and they take about 1 hour to dry and handle.

Tips: Make sure you fully clean all the glass surfaces well before applying the paint. The instructions say to spray the back side of the glass, then turn it over after it’s dried to reveal the mirror surface.

Chalkboard Clock

Check out this beauty:

DIY Chalkboard Clock

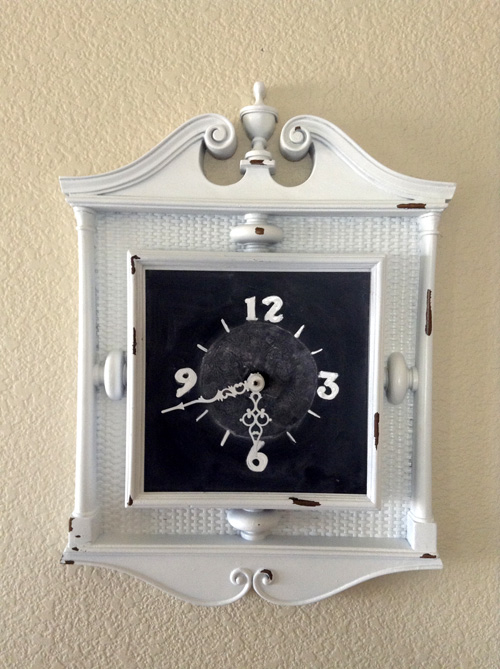
$3.50 thrift store clock.

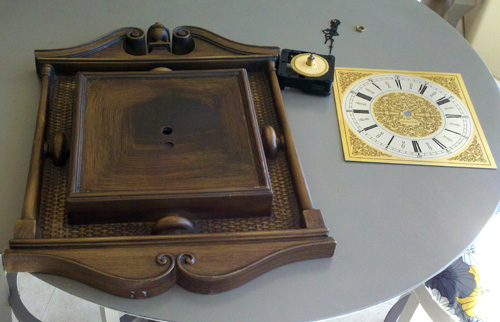
I saw it in Salvation Army about a week ago and my mind was turning trying to figure out what I could do with it. I liked the woodwork on it and thought it would be awesome to paint and distress but I had to think of a way to hide the nasty brass clock plate.

So I decided to try something different and use chalkboard paint for the plate since I still have tons left from previous projects.

This is what I came up with:

DIY Chalkboard Clock

Chalkboard clock after a makeover.

I probably don’t really need to go through all the steps because I’ve covered many of these techniques in previous posts but I’ll give you a quick summary of how I did it.

DIY Chalkboard clock

First I removed the plate. It was really easy to do. I basically just twisted off the back piece and unscrewed the front. Thankfully there was no glue to deal with so it came off easily and cleanly.

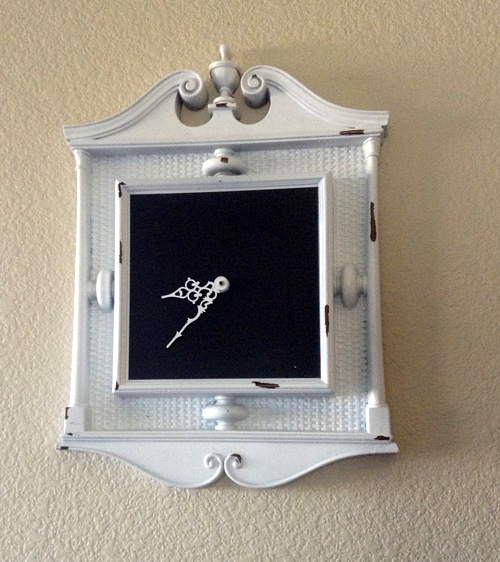
The next part is pretty self explanatory. I cleaned the clock and all the pieces and then sprayed each of them with spray paint. I used the Vaseline technique again on the wood part and used a satin white spray paint with primer. I also sprayed the clock hands and screws with white paint so it would contrast against the chalkboard. Then I sprayed the brass metal plate with the chalkboard paint. (Make sure you always read the full instructions on the back of your spray can. I have made some dumb mistakes before because I wasn’t paying attention!).

DIY Chalkboard clock

Here it is after the paint dried and I put all of the pieces back together. Chalkboard paint still had to dry for 24 hours before the first use!

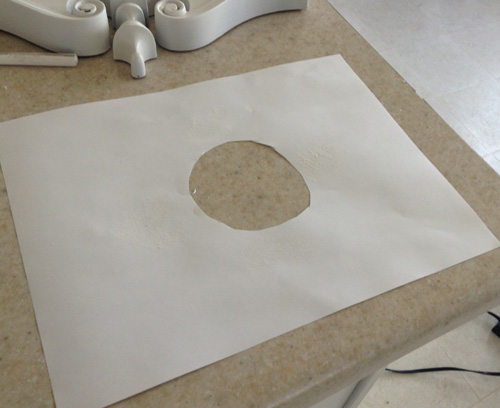
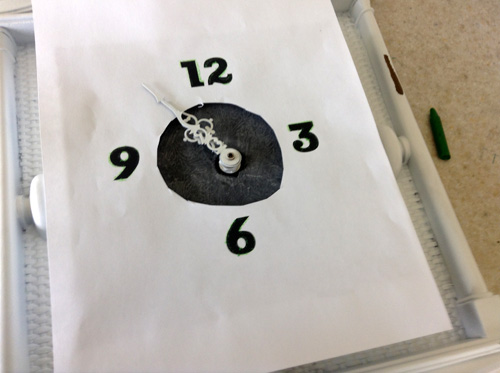
After everything dried, I measured the chalkboard plate. Mine was 7×7 so I created a file in Illustrator (you can use other programs too if you don’t have that one) that was 7×7 and using some guidelines to make sure the positions were accurate, I put a 12, 3, 6, and 9 at their appropriate spots, printed it and then chalked the backs of the numbers. I cut a hole in the center so I could stick the hands through it when I traced the numbers.

DIY Chalkboard Clock

Turn the paper over and chalk the back behind all the numbers you will be tracing.

DIY Chalkboard Clock

I used a crayon to trace the numbers so that it wouldn’t scratch the surface of the chalkboard.

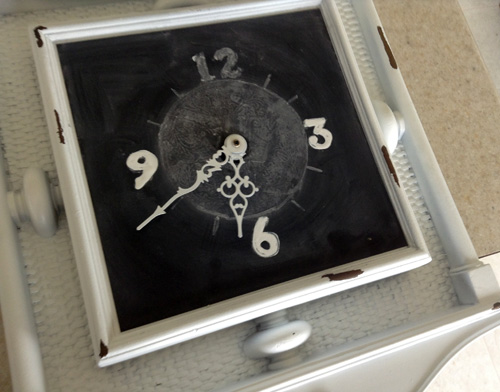
After I transferred the chalk numbers I went back with a white paint pen and filled them in with that. Since the numbers are permanent I didn’t want them to accidentally be rubbed off. Plus the paint pen made it still look like chalk only brighter and more crisp!

DIY Chalkboard clock

I used a paint pen to trace the chalkboard numbers.

DIY Chalkboard Clock

Chalkboard clock after a makeover.

And here is the final product again. Not bad for $4?