I’d heard a lot about Chalk Paint and seen tons of things on Pinterest related to painting old furniture with this “miracle” paint, so I decided it was time for me to take the plunge and try it out. To be honest, I was nervous. I guess the special brushes and the pricey-ness of the paint itself along with the whole wax thing made me feel a little intimidated.
What really encouraged me in this direction is when I found a Chippendale-style dining set at my local thrift store for only $75. The finish was not good though. The top was majorly scratched and dinged and the chairs were covered with a dingy old fabric. But, the table was a nice size, with a leaf included, and there were 5 chairs.

Thrift store Chippendale-style dining set. $75.
I wanted the top to be durable, so I googled a bunch of different ideas. The one I liked best, suggested using an antique furniture refinisher to rub off the old stain on top with steel wool. I ended up using Fromby’s Furniture Refinisher:

Awesome stuff, but plan on using multiple cans of it if you’re stripping a large surface!
I found this YouTube tutorial that I mainly followed: https://www.youtube.com/watch?v=v7OW60YncY4
Here are a few things that I learned from this process.
1) DO NOT BUY LATEX GLOVES. Don’t even buy just regular rubber gloves. You need to buy the gloves that say they are made for working with strong chemicals. And even when I used those, eventually they would eat through after enough use. You may have to buy several pairs of gloves (2-3)
2) You will most likely end up going through a lot of refinisher if you’re stripping a large area. I ended up having to buy 3 jugs of refinisher.
3) I think I used an entire package of the steel wool when all was said and done.
4) You also need a metal bucket to put the refinisher in. I found using 2 metal buckets was best, because each time you dip your steel wool back in to get more refinisher on it, you end up dirtying the rest of the refinisher. It was best to have refinisher in 2 buckets. One for rinsing and squeezing out as much old stain as I could, and the other for getting some cleaner refinisher to go back to the table with. If the second bucket started getting too gross I would add it to the first bucket and add some clean refinisher to the 2nd again.
Once I finished this process, this beautiful underlying wood was revealed:

The stain had darkened so much and was so dinged and scratched that I didn’t even know the wood had a pattern in it until I stripped it!
I used Minwax Polyshades to stain the top of the table. I chose Bombay Mahogany in the gloss for the shade.
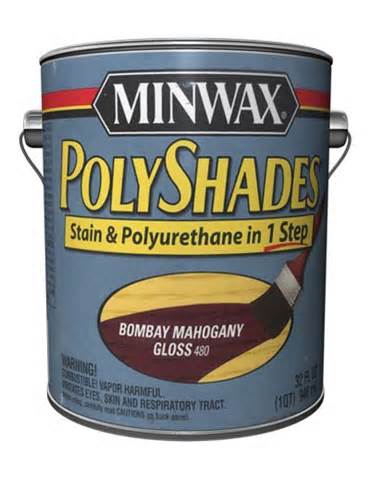
There is a dark cherry quality to this stain. I love the way it classed up the top of the table.
The YouTube tutorial above does a good job explaining the kind of brush you need. Usually you’ll only need one coat of this since the protective agent is mixed into the stain. We only used one coat and were happy with it. If you want it darker you can add another coat after 6 hours. Make sure to lightly sand between coats.
After taking care of the stain, I tackled the chairs, and base of the table with my Annie Sloan Chalk Paint. I chose the white color since all of our molding is true white. The nice thing about it is you don’t have to do any prep work whatsoever. I lightly dusted all of the chairs and the table legs, but no sanding is necessary. This makes the process a lot quicker and easier.
 Because I chose the only paint that doesn’t have any pigmentation to it, it required 2 coats of paint to get the chairs how I wanted them. But since I wanted them to look distressed, I was satisfied with the results. If I had wanted them to be more opaque and smooth, I would’ve probably done a 3rd coat. Here are a few things I learned in the process:
1) The paint dries super quickly. That means that once you finish your first coat, you can usually start immediately on a second coat.
2) You don’t have to purchase the special brushes. You’ll want a good quality brush, but it doesn’t have to be an Annie Sloan one. I used a nice Purdy brush and it worked beautifully.
3) The chalk paint washes easily out of the brushes. Even after having a blonde moment and forgetting to wash my brush one evening, I was able to easily wash it out almost completely in the morning.
4) You can pretty much finish a painting project within 30-40 minutes since the paint dries fast and as soon as you sand/distress (if you desire), you can start the waxing process immeditately.
5) You can use an old t-shirt to rub the wax into the piece.
6) The paint goes a long way. With pieces that I’ve painted that have more pigmentation, I’ve only had to use 1 coat.
7) There are TONS of tutorials on using Annie Sloan wax on YouTube, so take advantage of this! I watched several before starting this project and I recommend you do too.
To recover the chairs, I used some fabric and plastic covering for the seats along with a staple gun, just like I did with my pub set. My goal with this table was to have a very elegant looking table to was also practical for having children.

I utilized the fabric in a way that I could get 2 seats covered from one yard. If it hadn’t been so darn economical, I would’ve probably turned the pattern 90 degrees CCW. But frugal-ness won… again.
I also opted for the distressed look because it is sure to be dinged up and damaged by my 3 year old and our soon-to-be adopted daughter.
So I have to admit, I haven’t quite finished this set yet, because I have to work within my monthly budget and I can’t buy more fabric until the 10th, but it’s a good start:

You’ll notice that I’ve included that antique chair I repainted and recovered for now, until I sell it (or don’t).
And since this project I’ve done several more, but all with the intention of selling them to make money for our adoption. It will be hard to part with these pieces, because they were so fun to make!

Charming curio cabinet with original antique key. Painted Duck Egg Blue. I love the patina on all the brass hardware!

Adorable antique Dixie night stand/end table. Painted Duck Egg Blue.

Chalkboard created from a thrift store mirror. Painted with Annie Sloan’s White chalk paint.


 Here is how it looked when I was done:
 Then you want to very carefully cut out your felt letters and fabric glue them to the other fabric piece you traced the lettering on. The traced area will help you place the letters perfectly on the fabric. The fabric glue will also hold the letters in place when you stitch them to the fabric.


